


Building a Custom Mechanical Keyboard
July 22, 2020At the start of the COVID-19 lock-down, I found myself in need of a new keyboard - having realised I had left my old Razer BlackWidow keyboard at work. With absolutely no desire to risk public transport to fetch it, I purchased the cheapest mechanical keyboard I could find on Amazon that was wireless and had decent ratings.
When it arrived, I noticed that this keyboard was a lot more "clicky" than keyboards I had used in the past. Why was this keyboard so much louder and yet so much more satisfying to type on than my more expensive Razer keyboard? I found myself on a webpage that described the different types of mechanical keyboard switches, it turns out that this Amazon keyboard contained switches which were clones of Cherry MX Blue switches, which are switches of the "clicky" archetype... I began my descent down the rabbit-hole; I was watching YouTube soldering tutorials, researching the best types of lube for keyboard switches/stabilisers and learning the differences between ABS double-shot and PBT sub-dye keycaps. Some people were passing the time locked indoors by excessive baking, I had decided that I was going to build my own custom mechanical keyboard.
Parts Selection
Size
The first decision I made was the size of the keyboard, the most popular of which are:
- Full-sized - regular sized layout keyboard
- Tenkeyless - regular sized layout but missing numpad
- 75% - Compact layout missing numpad
- 65% - Compact layout missing function keys and numpad
- 60% - Compact layout missing function keys, numpad and arrow keys.
I decided to go with 75% as I never used the numpad and require the function keys for shortcuts within my programming software of choice, IntelliJ. I also prefer a compact form factor to save desk space.
PCB, Plate and Case
The size selected informed a few other purchasing decisions. The 75% layout requires around 85 switches; I purchased 100 switches. It's better to purchase more to leave some room for error. The layout also meant I had to purchase a 75% PCB with a case and plate which were compatible with that PCB.
PCB, case and plate compatibility are a bit of an issue in the mechanical keyboard marketplace. There are no real standards for any layout other than perhaps 60% and so I recommend purchasing DIY kit from a vendor to ensure compatibility.
I purchased Kbdfans75v2 two-tone silver DIY kit which provided me with a PCB, plate, stabilisers and a case.
Switches
The next decision to make is the type of switch. There are three types:
- Linear - Soft switches that trigger when bottoming out the switch
- Tactile - Switches with a bump which trigger at the bottom of the bump
- Clicky - Similar to tactile except an audible click can be heard when the switch is triggered
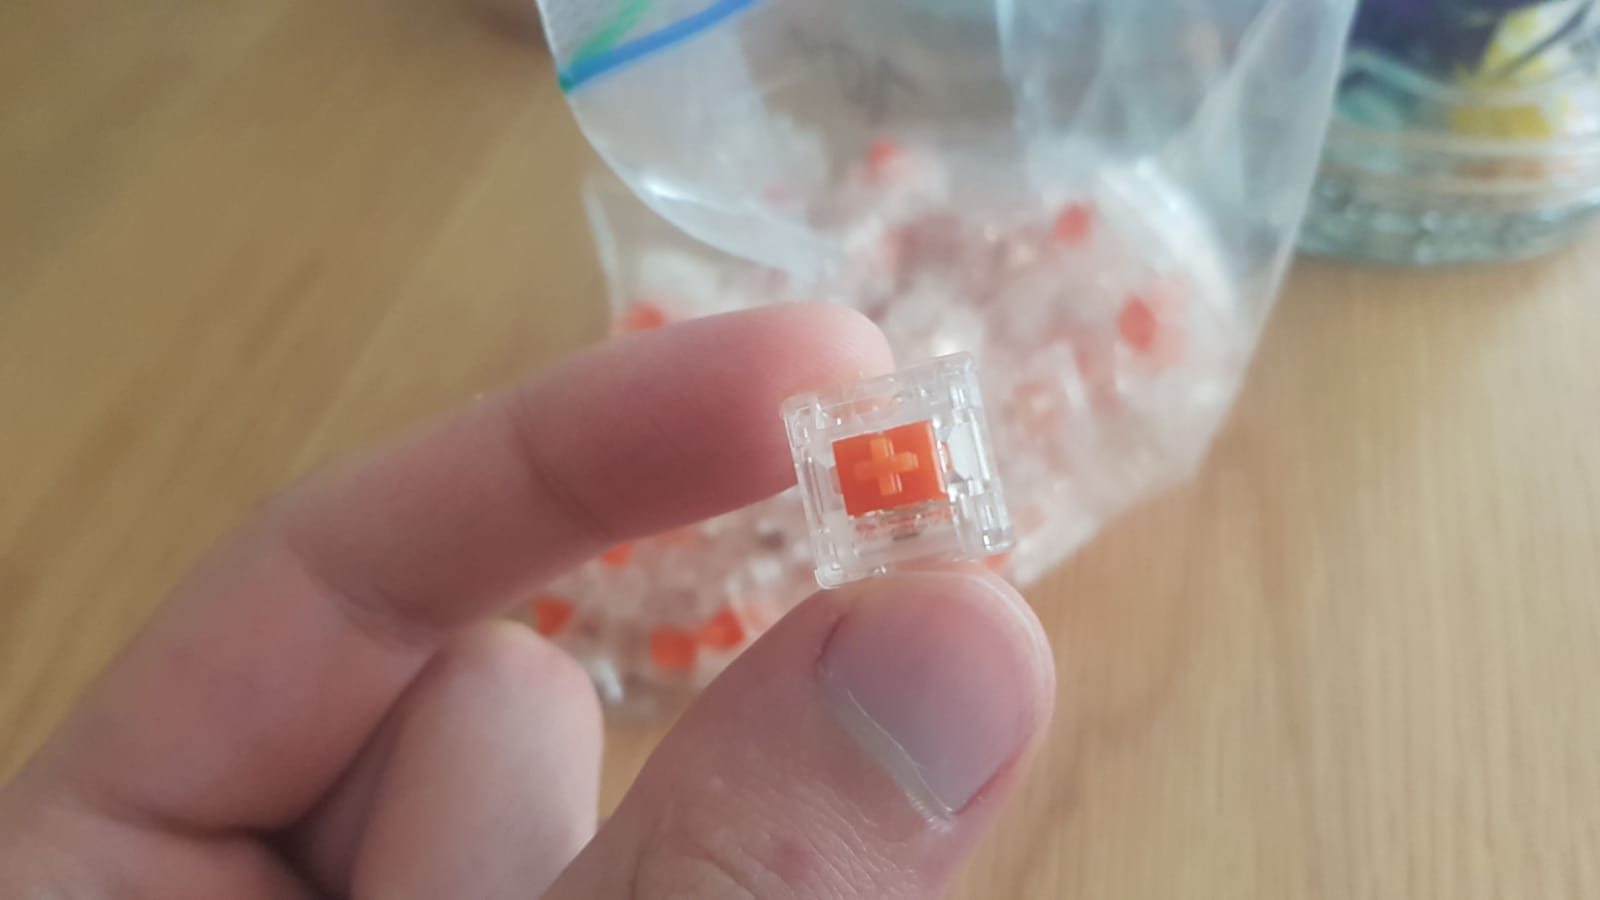
I wanted a switch that I could take into the office with me and not disturb my co-workers, so clicky switches were immediately removed as an option. I decided to purchase the Helios Orange linear switches, they were described as soft but silent. I think I will build a tactile switched keyboard next.
Keycaps
The final piece of the puzzle is the keycaps. Keycaps are a deep topic. As I alluded to in the intro, the type of plastic, (ABS, PBT), manufacturing method, (double-shot, sub-dye), and profile, (shape of the keycap) can play a large part in how the keycap sounds and feels.
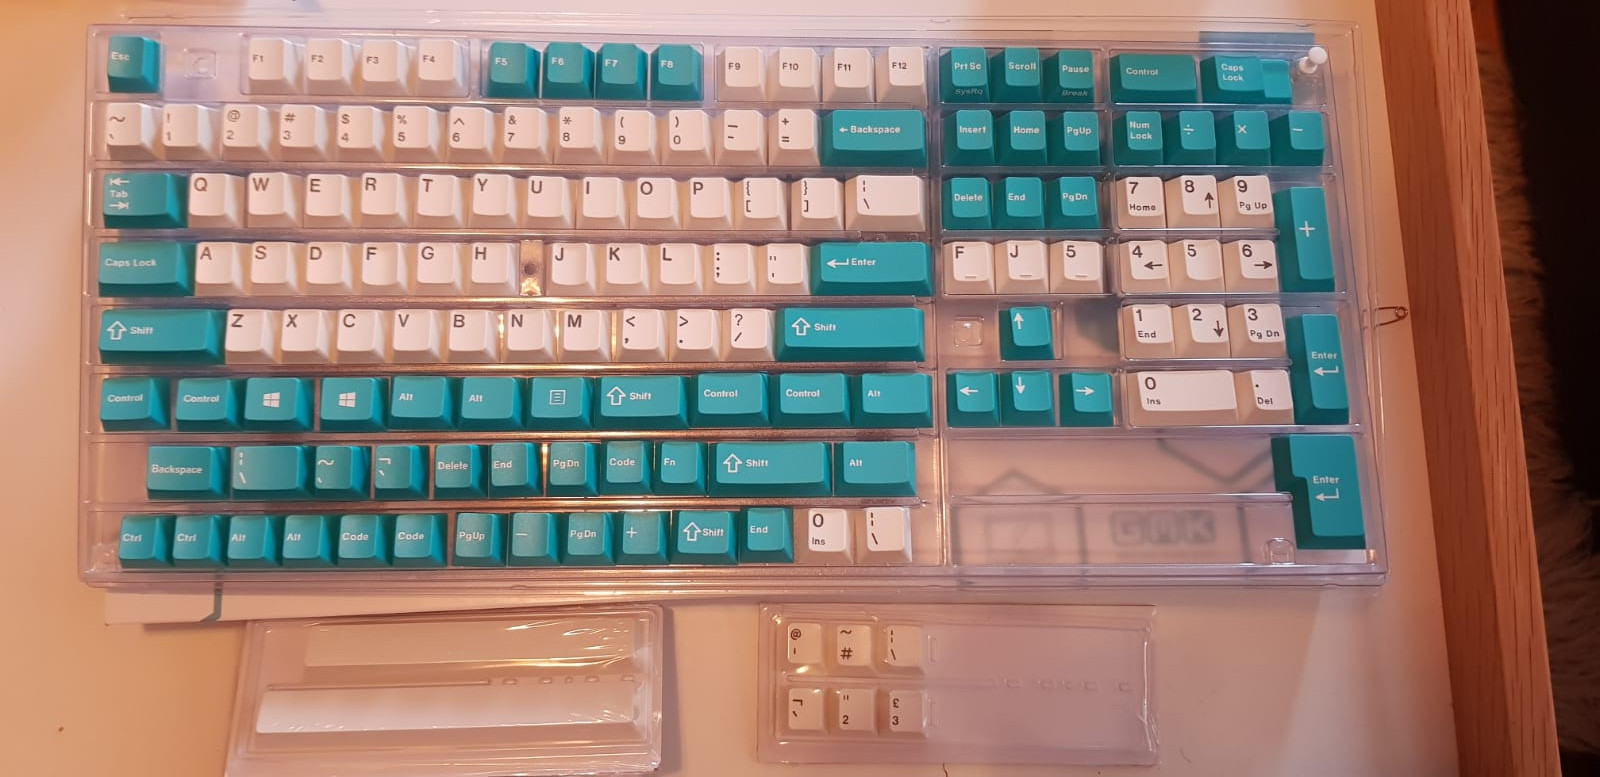
I decided to go with GMK keycaps, which are German manufactured thick ABS plastic, double-shot keycaps. They are regarded as some of the best by the mechanical keyboard community, albeit expensive.
I purchased the GMK Cyan 2D Keycap kit from Originative, I like Dave2D's aesthetic.
The Build
Once all the parts arrived, which took around 2 months, I could finally begin the building process!
Lubing (Optional)
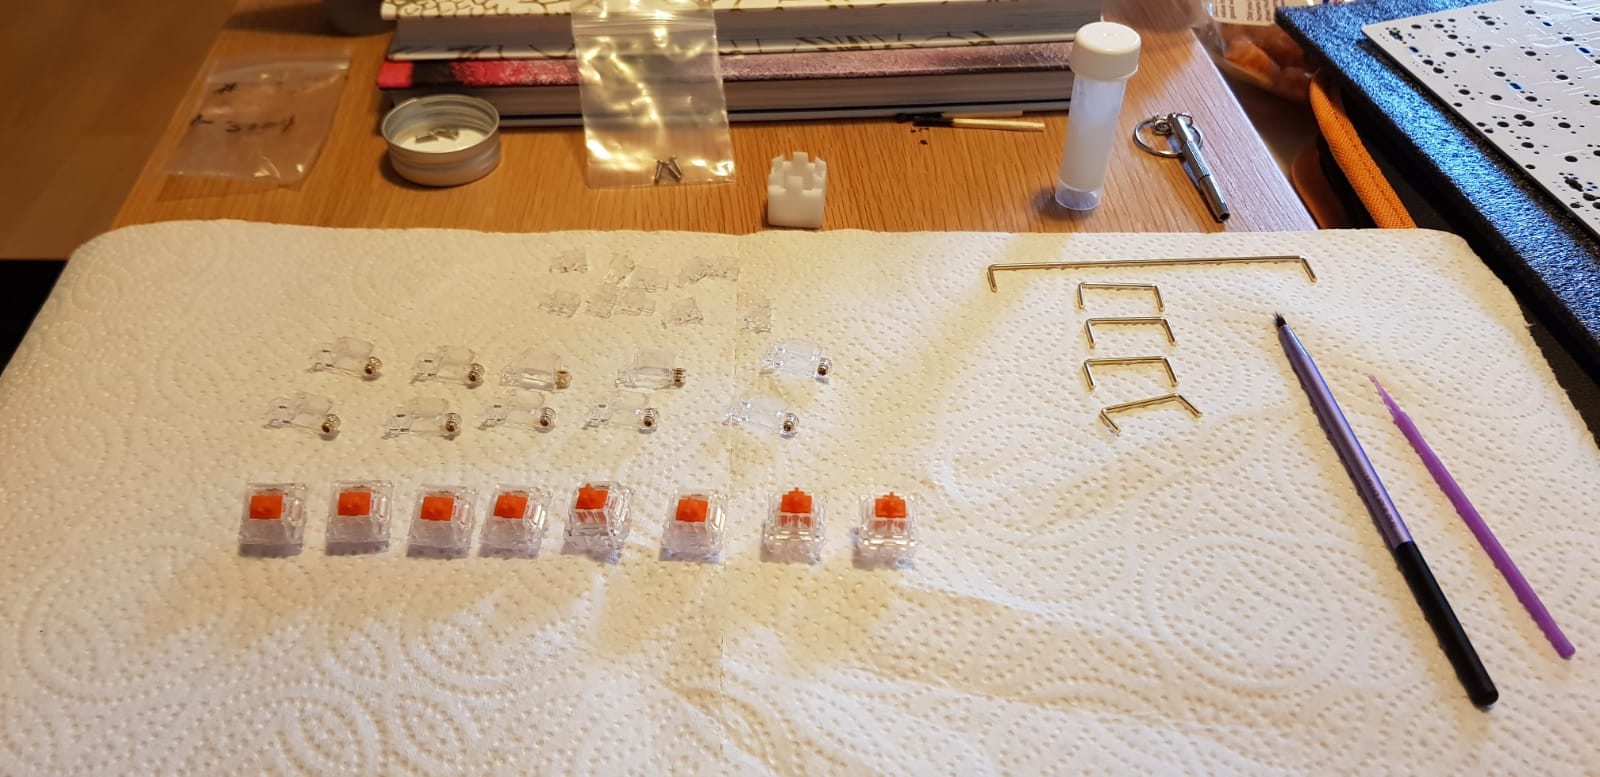
I began by lubing my switches. This involved taking apart each of the 100 switches and, with a brush, applying a thin layer of lube to the ends of the spring, the stem and lower housing. As you can imagine, this is a lengthy process. So why do this? Well, lubing is mainly about sound and feel. Lubing makes the movement within the switch more fluid, reducing the "scratchiness" of the switch as well as improving the sound produced when pressed.
If you want your switches to sound their best and be at their smoothest, lubing is the way to go, but I do not blame you if this sounds your idea of hell. I found the process extremely dull and could only manage around 20 switches in one session whilst watching TV.
I did however manage to get through all 100 switches and moved onto the next task, lubing the stabilisers. This is much easier to do, as there is no-where near as much to lube and the surface area is flat, making applying the lube much easier. I simply applied a thin layer of lube to the inside and outside of the stabilizers parts as well as a thicker layer on the ends of the wires. This took me around 20 mins to complete. Even if you avoid lubing your switches, I would recommend lubing your stabilisers. Trust me, you don't want a squeaky space bar.
I used Krytrox 3204 lube, purchased from Zeal, another recommendation from the mechanical keyboard community.
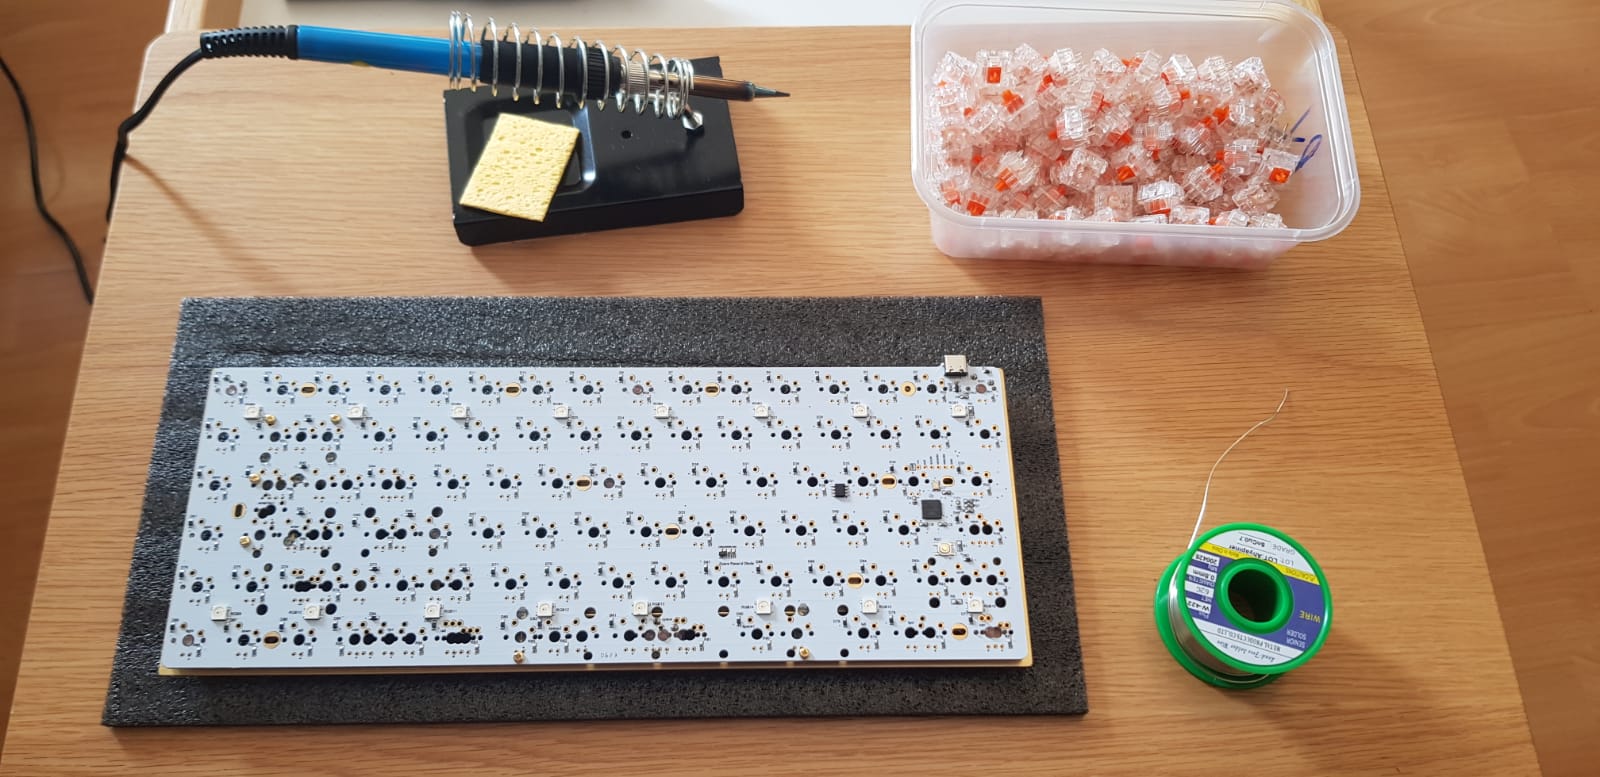
Testing your PCB (!important)
Before you begin attaching components to your PCB, you should test your PCB to ensure that each key works correctly. This is an incredibly important step. You don't want to have soldered all your switches to your PCB only to find it's faulty. You can test your PCB by heading over to keyboardtester, plugging in your PCB and then using some tweezers to complete the circuit for a switch by placing it on the two copper holes where your switch will sit. Do this for each key, verifying that the key is lit up on the keyboardtester UI.
Once again, do this BEFORE you attach any components to your PCB, it's quick and easy to do and could save you a lot of pain.
Assembling the Stabilisers and Attaching to PCB
With both the switches and stabilisers lubed and having verified a working PCB, (phew!), I moved onto assembling the stabilisers and attaching them to the PCB. This is a pretty easy process but just be careful when assembling the stabilisers as if you do so incorrectly, your keys will not bounce back once pressed. Watch this video tutorial as the process is much more easily shown rather than explained.
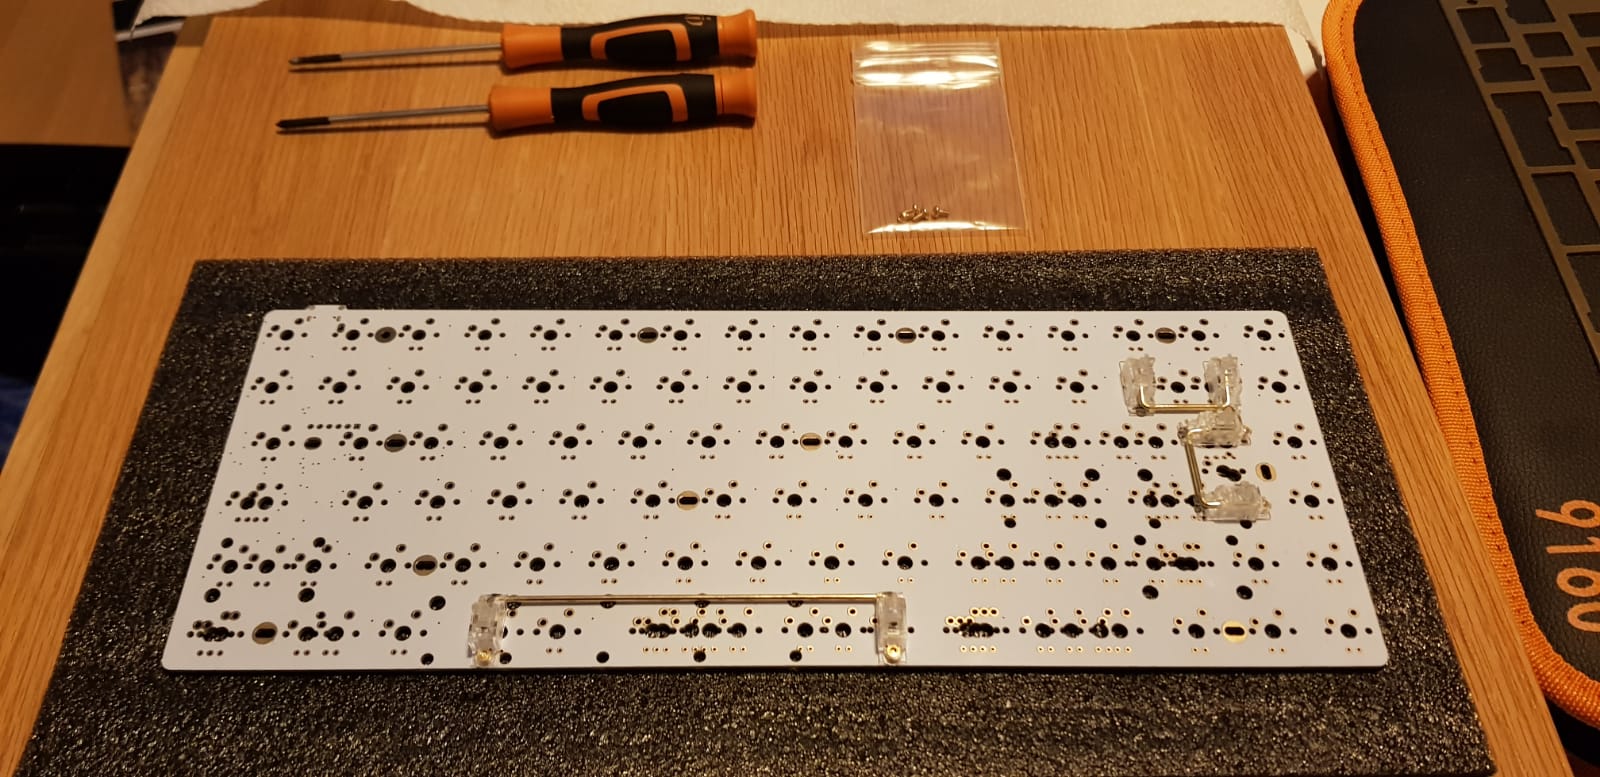
Once assembled, I attached the stabilisers to the PCB. Even though I had some stabilisers which came with my DIY kit, I decided to purchase some Zeal screw in stabilisers. These stabilisers attach to the PCB via a screw on each end. I was recommended screw-ins over clip-in stabilisers, like the ones that came with the kit, as they generally are deemed more stable.
Where to place your stabilisers will depend on what key layout you select: ISO, (International Organization for Standardization) or ANSI, (American National Standards Institute). An easy way to tell the difference is by looking at the enter key; if the layout is ANSI, it will be rectangular shaped like the backspace key. If it looks more like a square with a chunk missing from it, it's ISO layout. As a non-American, I went for the ISO layout which meant I positioned my enter key stabiliser vertically as labelled by my PCB.
Attaching Plate and Switches to PCB
Time for some soldering! This was the part of the build that I was worried about the most, I haven't soldered anything since secondary school. I originally planned to purchase a hot-swap PCB. This would mean I could simply slot the switches into the PCB, no soldering required, however I quickly found that the demand for this type of PCB was high. I struggled to find a hot-swap version in-stock. No matter, I purchased a cheap soldering iron on Amazon and binge watched a few soldering tutorials on YouTube.
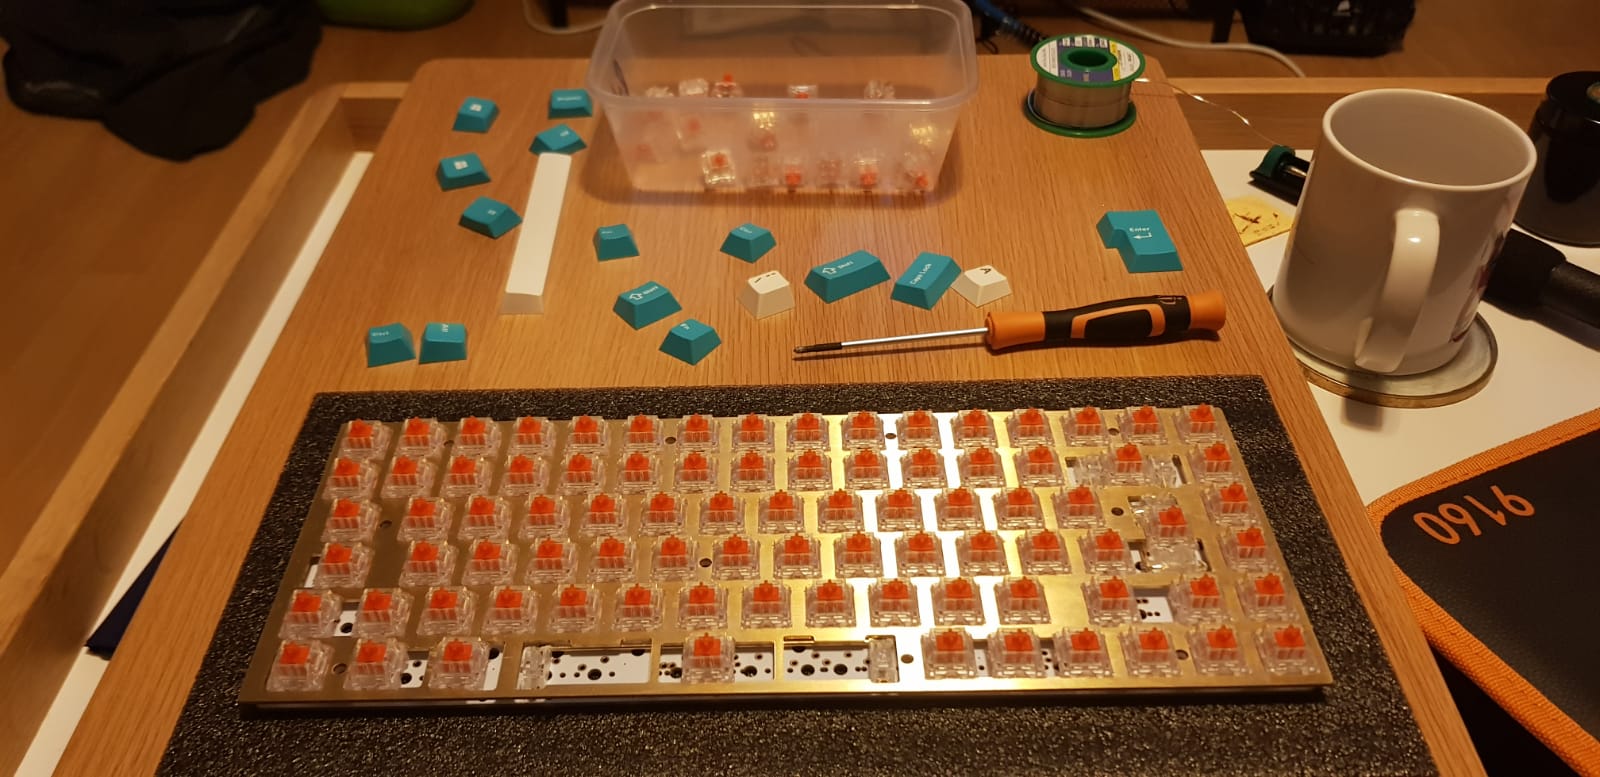
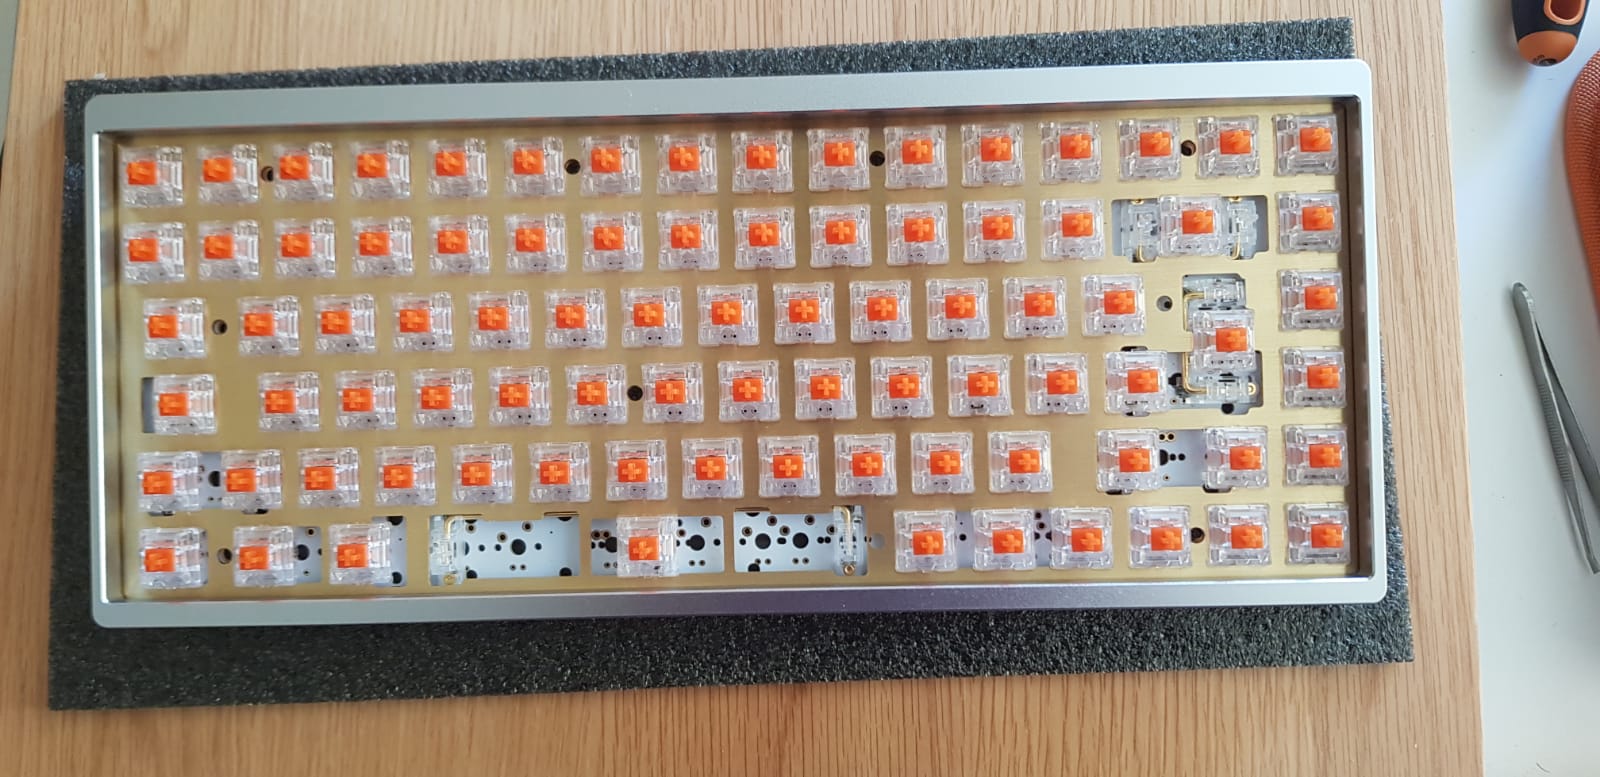
First I placed the brass plate over the PCB and then inserted all the switches in the appropriate place. I found this process difficult at first. I struggled to get the switches to clip into place with the two pins on each switch going through the copper holes in the PCB. I quickly found a better technique of using the flat rubber bottom of my screwdriver, rather than my hands, to push the switch into place. I did mistakenly bend the switch pins a few times doing this, but this was easy to remedy by taking the switch out and using some tweezers to bend the pins back into place. I would highly recommend using your keycaps to aid in ensuring your switches are in the correct position.
Once I thought all the switches were in the correct place, I began soldering. Again, before starting soldering, make sure the switches are flush against your PCB with both pins through the copper holes and make sure they are in the correct position. If you do make a mistake after soldering, you'll have to go through the ordeal of de-soldering and getting the switch out. De-soldering is a painful process, I ended up having had to de-solder two switches which I placed in the wrong position. Not fun. The soldering itself was surprisingly easy, the hardest bit was de-soldering but this can be completely avoided by being careful.
Once I was done soldering I tested again on keyboardtester, this time you can trigger the key by pressing the switch! Doing this I discovered I had forgotten to solder the enter key... A few moments later and I was ready to move onto the next stage.
Assembling the case and Inserting Keycaps
Next up was assembling the case, this was probably the easiest step of the entire build. Before doing anything else, I stuck the rubber feet on the bottom of the case, this is to ensure that I didn't accidentally scratch the bottom of the case in the assembly process.
Assembling the Kbdfans75v2 case was easy. It consisted of de-assembling the case by taking out all the screws, then screwing the PCB into the bottom panel and acrylic piece, then screwing the top piece into place and finally screwing in the brass weight into the bottom of the case.
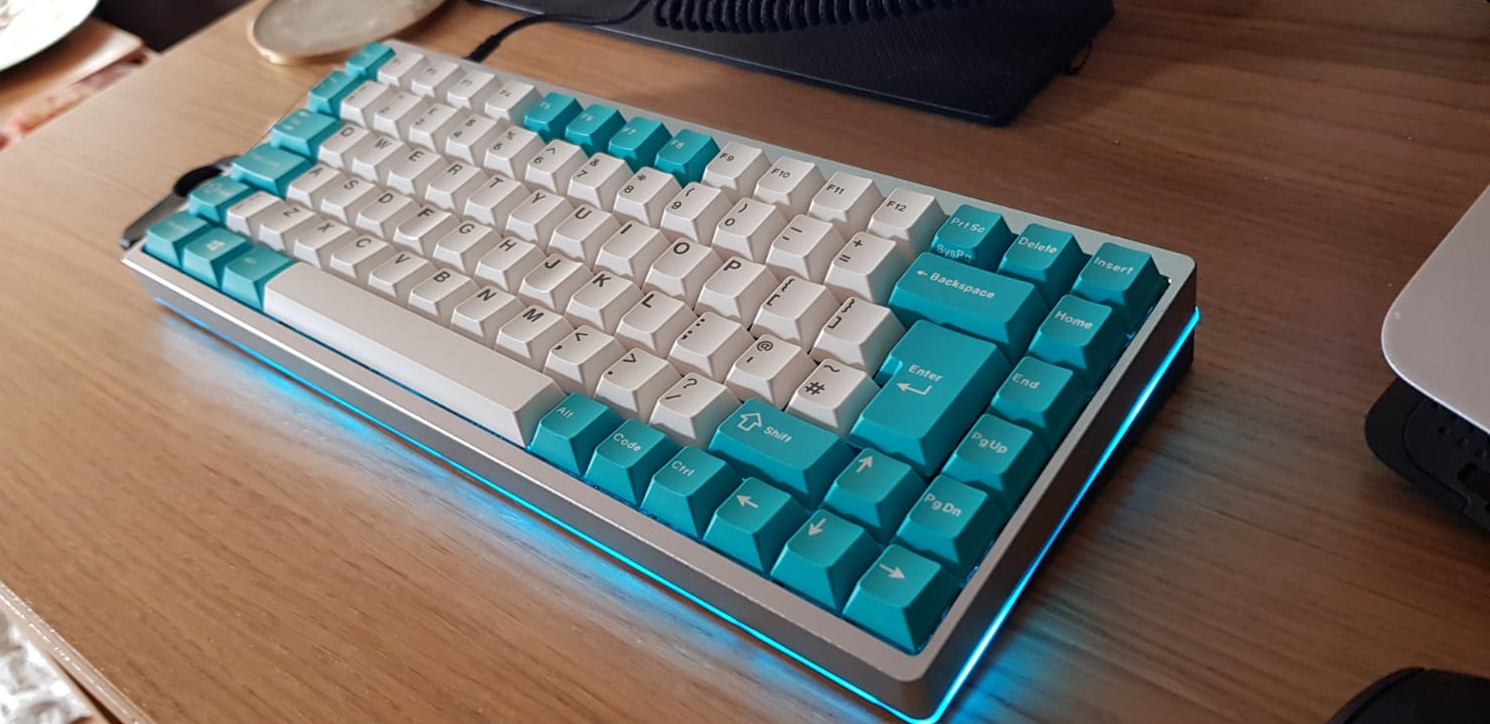
All that is left to do now is to push each keycap into the switch in the appropriate place, and on completion I had build a custom mechanical keyboard!
Conclusion
I use keyboards a lot. My job as a software developer means I'm pretty much hammering that semi-colon key all day long. Even when I'm not working, I spent a lot of time gaming and browsing the web, now more than ever due to COVID-19. It's fair to say this keyboard will see a lot of use. Building your own keyboard is not for everyone though. It is an expensive hobby, the building process is time consuming and the parts do take an extremely long time to ship. That being said, I'm really pleased with the result of this project. The keyboard is so quiet and smooth, I love typing on it. The cyan and white keycaps combined with the blue underglow looks clean. I've built a keyboard which is uniquely personal to me and I've had a lot of fun along the way.
I maaay have already ordered parts for my next custom keyboard...